
Lifestyle product photography shows a product in use within a real or styled scene, rather than isolated on a plain background, so shoppers can picture owning it. The simplest way to start is a natural-light setup near a window, paired with a short styling checklist and two or three complementary colours or props. Copyright permissions and accurate colour reproduction both matter and we cover them below.
TL;DR:
- Using a tripod ensures consistent framing and reduces editing time for lifestyle product photos.
- Optimal lighting relies on north-facing windows or daylight-balanced LED lights with a high CRI around 95 for true color accuracy.
- Scene composition benefits from a balanced mix of scene-setting and close-up shots, with roughly half the gallery dedicated to each.
- Shooting in RAW and setting manual white balance helps maintain color consistency and offers more editing flexibility.
- DIY photography suits small ranges or occasional needs, but professional shoots are recommended for larger catalogs or brand launches.
Table of Contents
- Equipment and lighting that give consistent results
- Composing scenes that keep the product as the hero
- Camera settings and shooting recipes you can repeat
- Editing that keeps colours honest
- Copyright and licensing basics worth knowing
- A professional’s process and two setup templates to borrow
- Planning a shoot before you pick up the camera
- Shooting with models or people interacting with the product
- Building a mood that tells a story
- Handling different materials in a lifestyle setting
- Shooting indoors, outdoors and in tight spaces
- When DIY is enough and when to book a professional
- Brand and product photography when you’d rather hand it over
- FAQ
- Sources
Equipment and lighting that give consistent results
You don’t need a studio to get clean, repeatable shots. A tripod matters more than almost any other purchase: it keeps framing identical across a shot sequence, which makes editing faster and the final gallery feel cohesive. A phone camera with a tripod mount works for social content, while a prime lens on a mirrorless or DSLR body gives sharper detail and better background blur for hero images.
Light is where most beginners lose quality. Canon UK recommends north-facing windows because they give soft, even daylight without the colour shifts that direct sun causes. On overcast days, move the product closer to the window; on bright days, hang a sheer curtain or use a diffuser to soften harsh shadows. When daylight isn’t reliable, the same source suggests LED panels or speedlites with adjustable colour temperature, ideally around 5,600K with a high Colour Rendering Index (CRI) near 95, so colours stay true without heavy correction later.
A simple starter kit covers most needs:
- A tripod with a phone mount or standard camera plate for consistent framing.
- One LED panel or a pair of desk lamps swapped for daylight-balanced bulbs.
- A white foam board as a reflector and a sheet of baking paper or a diffusion panel for harsh light.
- Two or three neutral backdrops: a wooden board, a linen cloth, a plain wall.
Pro Tip: Bounce light back onto the shadow side of the product with a white card rather than adding a second light source: it keeps shadows soft without flattening the scene.
Composing scenes that keep the product as the hero
A lifestyle shot works when the eye lands on the product first, then wanders into the context around it. Position the product off-centre using the rule of thirds, and leave deliberate negative space so the scene doesn’t feel cramped. Depth of field does a lot of the storytelling: a wide aperture (f/1.8 to f/2.8) blurs the background into a soft wash of colour and texture, while a narrower aperture (f/5.6 to f/8) keeps surrounding props sharp enough to build context, which suits flat lays or scenes with multiple items.
Styling follows a short, repeatable sequence:
- Choose a colour palette of two or three tones that echo the product’s own colours or packaging.
- Add one textured layer, such as linen, wood grain or ceramic, to stop the scene looking flat.
- Vary scale with a small supporting prop (a cup, a plant, a book) so the product’s size reads correctly.
- Step back and remove anything that doesn’t support the story: clutter is the most common styling mistake.
Props don’t need to be expensive. Charity shops, craft suppliers and home stores such as Zara Home are reliable sources for neutral linens, ceramics and small decorative objects that photograph well without shouting for attention. Everyday items, a tea towel, a chopping board, a houseplant, often work just as well as anything bought specifically for a shoot.
Camera settings and shooting recipes you can repeat
Consistency comes from locking a workflow rather than guessing settings each time. On a phone, tap to set focus on the product, lock exposure, and use the grid overlay to keep horizons level. On a mirrorless or DSLR body, start around ISO 100 to 200, an aperture between f/2.8 and f/5.6 depending on how much context you want in focus, and a shutter speed fast enough to avoid camera shake when handheld, or anything stable on a tripod. Set white balance manually to match your light source rather than relying on auto, since auto white balance shifts between frames and creates inconsistent colour across a set.
A practical shot sequence for each product covers both wide and close viewpoints:
- One holistic shot showing the product in its full setting, with props and context visible.
- One or two medium shots showing the product from a flattering three-quarter angle.
- One or two macro or close-up shots highlighting texture, stitching, labels or material.
Research on review images finds that a balanced mix of holistic and detail shots, with a Holistic Image Proportion close to 0.5, tends to maximise perceived completeness and purchase intent, according to a study on review image composition. In practice, that means roughly half your gallery should be scene-setting shots and half should be close detail.
Shoot in RAW where your camera allows it. RAW files hold far more colour and exposure information than JPEG, which gives you room to correct white balance mistakes without introducing banding or colour shifts during editing.
Editing that keeps colours honest
Editing should make a lifestyle shot look finished, not artificial. Start by correcting white balance across the whole set so skin tones, fabrics and product colours stay consistent from frame to frame, a particularly important step if you mixed window light with LED panels during the session. Adjust exposure and crop for composition, then retouch selectively: remove dust or stray marks, but avoid smoothing textures or over-saturating colours, since a product that looks different online than in person drives returns.
For export, keep a simple preset per platform:
- Web and ecommerce: sRGB colour profile, JPEG format, long edge around 2,000 pixels.
- Social media: sRGB, JPEG, square or 4:5 ratio depending on the platform’s current crop.
- Print or portfolio use: higher resolution TIFF or high-quality JPEG, CMYK only if a printer specifically requests it.
Pro Tip: Build one Lightroom or Capture One preset from your best-lit shot, then apply and fine-tune it across the rest of the set rather than editing each image from scratch.
Shopify’s ecommerce guidance notes that multiple high-quality lifestyle and product images correlate with better engagement on product pages, which reinforces why that 50:50 holistic-to-detail balance from the previous section is worth planning for rather than leaving to chance.
Copyright and licensing basics worth knowing
In the UK, copyright in a photograph normally belongs to the photographer, not the person who commissioned or paid for the shoot, unless a written agreement assigns those rights, according to Gov. If you hire someone to shoot your products, get a licence or assignment in writing before you use the images commercially. The same caution applies in reverse: check permissions before including branded artwork, packaging designs or other copyrighted props that belong to someone else in your scene.
A simple licence checklist for any commission brief:
- State who owns copyright and whether rights transfer or are licensed.
- Specify usage: website, social media, print, or all of the above.
- Set a duration and territory for the licence.
- Confirm whether the photographer can use the images for their own portfolio or marketing.
A professional’s process and two setup templates to borrow
Our shoots follow a short sequence: a brief to clarify what the images need to achieve, a plan covering props and locations, a directed shoot so the client never has to guess what to do, and rapid delivery once editing is complete. Two templates worth borrowing for your own sessions:
- Natural kitchen scene: product on a wooden board near a window, one supporting prop, one holistic shot and two close-ups.
- Styled tabletop with LED: neutral backdrop, LED panel at 5,600K, reflector opposite, three angles per product.
Browse our editorial and brand photography examples for a sense of how a directed shoot translates into a finished set.
Planning a shoot before you pick up the camera
A rushed shoot produces an inconsistent gallery, so plan before you shoot. Start with a shot list: how many products, how many angles per product, and whether you need holistic scene shots alongside close-up detail shots. Confirm your light source and time of day, since north-facing window light changes character through the day and overcast afternoons behave differently to midday sun.
Gather props and backdrops the day before, charged batteries, formatted memory cards and a clean lens the morning of the shoot. If you’re shooting several products in one session, group them by colour palette so you’re not rebuilding the scene from scratch for every item. A short checklist to run through before the first frame:
- Shot list confirmed, including the mix of holistic and detail images.
- Light source checked and backup diffuser or LED ready.
- Props, backdrops and cleaning cloths laid out within reach.
- Camera settings, white balance and focus mode tested on one item first.
- Storage and backup plan in place before you start deleting test shots.
Running through this once at the start saves far more time than it costs, particularly when a session covers more than a handful of products.
Shooting with models or people interacting with the product
Adding a person to a scene shows scale, use and emotion in ways a still object can’t. A hand holding a coffee cup or a model wearing a jacket mid-stride tells a shopper how the product behaves in real use, which static product shots can’t communicate.
Direction matters more than posing. Give the model a task, pour the coffee, open the notebook, lace the boots, rather than asking them to hold the product and smile at the camera, since movement and purpose read as more natural than a static pose. Shoot in bursts during the action rather than asking for a held position, and capture a few frames before and after the main movement, since the most natural expression often comes just before or after the instructed moment.
Keep the product visible and well lit even when a person is the focal point. A model’s hand or body can easily cast a shadow across the product, so check the light path before each sequence rather than after reviewing the images. Release forms matter here too: if you’re using images of identifiable people commercially, get written consent covering how and where the images will be used, which sits alongside the copyright permissions already covered for props and artwork.
Building a mood that tells a story
A lifestyle photograph works because it suggests a moment, a Sunday morning, a tidy workspace, a weekend outdoors, not because it documents a product in isolation. Decide on that moment before you shoot, since it determines your colour palette, your props and your light.
Warm, golden light and soft textures suggest comfort and routine; cool light and clean lines suggest precision or professionalism. Match the mood to how the product is actually used: a kitchen tool benefits from warm morning light and lived-in textures, while a piece of tech gear often reads better against cooler tones and simpler surfaces. Consistency across a gallery matters as much as any single shot: if one image is warm and cluttered and the next is cool and minimal, the set feels disjointed rather than considered.

Small details carry more narrative weight than large ones. A half-finished cup of tea, an open book, a coat slung over a chair, these suggest a life in progress rather than a staged set, and they cost nothing beyond a little thought before you start shooting.
Handling different materials in a lifestyle setting
Different product materials behave differently under the same light, so a single lighting setup rarely suits everything. Matte fabrics and wood absorb light evenly and forgive small lighting mistakes, which makes them a forgiving starting point for beginners. Glass, polished metal and glossy plastics are harder: they reflect their surroundings, including your camera, your light source and anything else in the room.
For reflective products, controlling what’s around the product matters more than adding brighter light. Neutral flags or black card placed just outside the frame shape which reflections appear on the surface, and a small shift in the camera’s angle or the product’s position often removes a distracting reflection far more effectively than adjusting exposure, a point covered in detail by guidance on reflective surfaces in product photography.
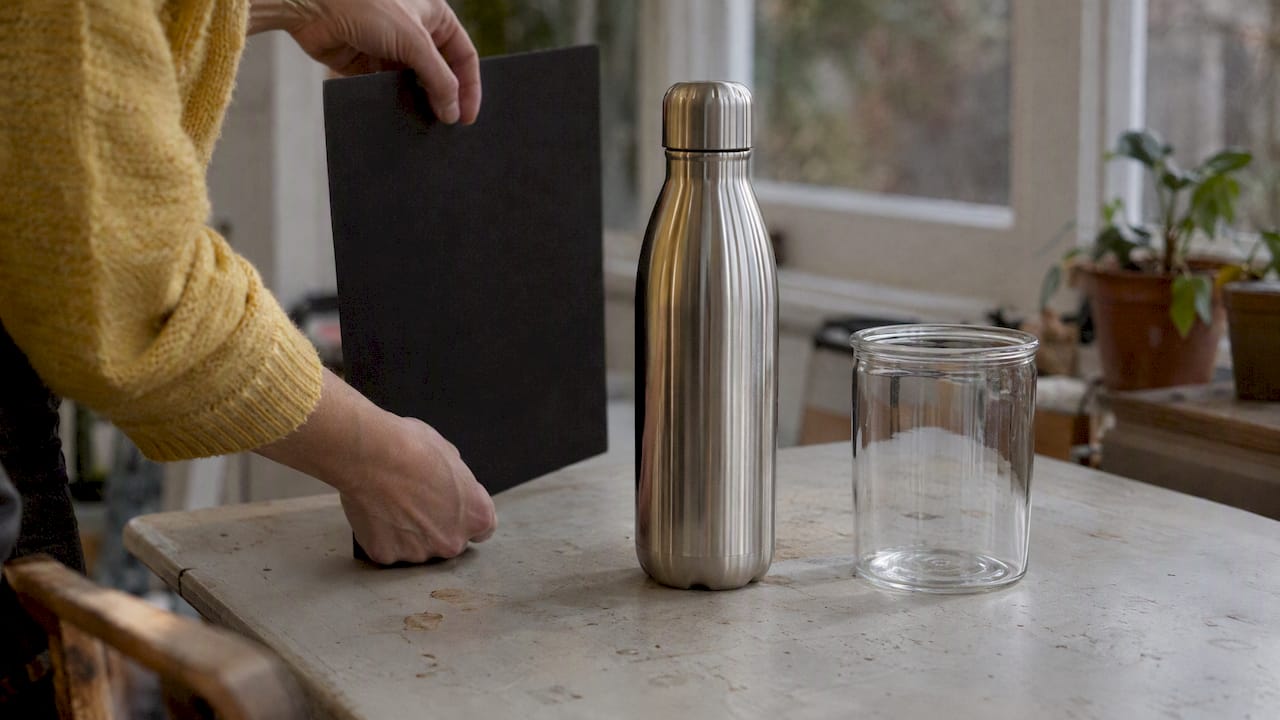
Fabrics and textiles benefit from raking light, light coming in at a low angle across the surface, which brings out weave and texture that flat, front-on light flattens out. Food and liquids need fast, decisive shooting since condensation, melting or wilting changes the shot within minutes, so set up lighting and composition fully before bringing the product into frame.
Shooting indoors, outdoors and in tight spaces
Indoor shoots give you control: consistent light, no weather to work around, and the ability to return to the same setup across several sessions. The trade-off is space, since most home setups are limited to a single window and a small table or floor area.
Outdoor shoots bring natural variety and more dynamic backgrounds, but light changes constantly. Shoot during the early morning or late afternoon for softer, warmer light, and avoid midday sun, which casts harsh shadows and overexposes pale products. An overcast day outdoors acts like a giant natural diffuser and is often the easiest outdoor lighting condition for beginners to work with.
Small spaces call for discipline rather than more equipment. A single window, a fold-out table and a plain wall are enough for a full shoot if you work the angles carefully: shoot low for a tighter crop that hides a cramped room, use a longer lens or zoom to compress the background, and move the product closer to the light source rather than trying to light a larger area evenly. A portable reflector does more for a small space than a second light, since it recycles the light you already have rather than adding another source to manage.
When DIY is enough and when to book a professional
DIY suits occasional shoots, tight budgets and small product ranges where a few hours of practice can get you usable images. Hiring a professional earns its cost for brand launches, large ecommerce catalogues or tight deadlines, where consistency and volume matter more than experimentation. If you do hire, bring a clear brief: shot list, mood references, usage rights and deadline, so the session starts with shared expectations.
— Emmet
Brand and product photography when you’d rather hand it over
When DIY shoots aren’t delivering the consistency a launch or a full catalogue needs, a directed shoot solves the problem in one session rather than several weekends of trial and error. We build every brand shoot around what the images need to achieve, then handle lighting, styling and direction so you walk away with a gallery ready for ecommerce, social and print.
- The Brand suits a focused product or brand session with a styled set.
- Business photography covers broader commercial and product imagery for ongoing marketing needs.
- Both are available studio or on location, with pricing and scope confirmed before booking.
Have a look at our portrait and brand services to see which package fits your next shoot, or get in touch through Lemonlens to talk through what you need.
FAQ
What is the difference between lifestyle and product photography?
Product photography typically isolates an item on a plain background to show it clearly and accurately, while lifestyle photography places the same item in a styled or real-world scene. Most ecommerce galleries use both: clean product shots for detail and lifestyle shots for context and emotional appeal.
What camera settings work best for beginners?
Start around ISO 100 to 200, an aperture between f/2.8 and f/5.6, and a shutter speed fast enough to avoid blur, adjusting for a tripod if you’re shooting handheld. Set white balance manually to match your light source, ideally daylight near a north-facing window or an LED panel around 5,600K with a high CRI, so colours stay consistent across the set.
How many lifestyle versus detail shots should I include per product?
Research on review images suggests a roughly even split between holistic scene shots and close-up detail shots tends to maximise perceived completeness and purchase intent, with a Holistic Image Proportion near 0.5 performing best. In practice, pairing one wide scene shot with one or two close-ups per product covers that balance.
Who owns the copyright if I hire a photographer?
In the UK, the photographer normally owns copyright in the images unless a written agreement assigns those rights to someone else, as set out in GOV.UK’s copyright guidance. Always agree usage, duration and territory in writing before using commissioned images commercially.
Can I use CGI or 3D rendering instead of photographing products?
CGI and photorealistic 3D rendering can supplement or replace photography for certain products, particularly where a physical sample isn’t available or multiple variations need showing. Visual Trick’s guidance on 3D rendering covers how CGI complements photography in a marketing mix rather than replacing it entirely.
Sources
For deeper technical detail, Canon UK’s product photography guidance covers lighting and equipment choices in more depth than fits here. For legal questions beyond the basics covered above, GOV.UK’s guidance on using someone else’s intellectual property explains licence terms and commercial use restrictions on third-party images. For ecommerce-specific advice on how photography fits into a wider product page strategy, Shopify’s guidance on product page optimisation is worth a read.