
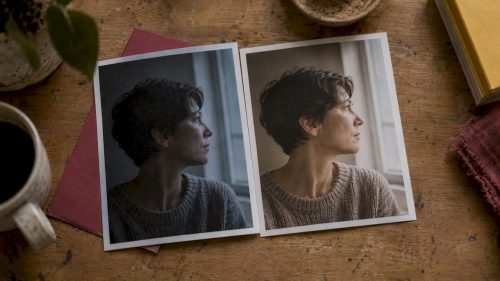
A RAW file is the unprocessed sensor data; an edited photo is the photographer’s developed interpretation, exported as a shareable file. Editing lets you recover exposure and colour and choose a visual style, while a JPEG is already processed by the camera and offers less room to change. Because RAW needs conversion before normal sharing, Adobe frames it as control, not a prettier first preview.
TL;DR:
- Back up originals to two locations, then set a camera profile and correct white balance and exposure before adjusting tone, color, or composition.
- For urgent delivery, shoot RAW plus JPEG, share the JPEG immediately, then use the RAW file to recover exposure or white balance later.
- Batch presets speed event editing, but copy settings from one representative image and adjust every frame individually because lighting and file responses vary.
- DNG preserves RAW information in an open archival format, and Adobe’s converter supports RAW files from more than 600 cameras.
- Calibrate your monitor and use the correct printer and paper profiles, since uncalibrated screens and mismatched profiles can shift colors in print.
Table of Contents
- What do the common edits actually change in a photo?
- How do you go from a RAW file to a finished photo?
- What does shooting RAW give you technically, and what does it cost?
- Which software should you use, and what is DNG for?
- How do you keep colours accurate from screen to print?
- What happens when different photographers edit the same RAW files?
- How does RAW or JPEG change your workflow and delivery times?
- Which format suits portraits, events, weddings and brand content?
- Why we edit to the brief, not for its own sake
- Need edited photos built around a clear brief?
- FAQ
- Sources
What do the common edits actually change in a photo?
Put a RAW file next to its finished version and the differences are rarely mysterious. Most of them come down to a short list of adjustments, each with a clear visual purpose. A RAW file often looks flat or slightly dull straight out of the converter, because nobody has yet decided how the captured data should be translated into a picture. Editing is that decision.
Here are the changes you will notice most often, and why photographers make them:
- Exposure: brightens or darkens the whole frame so the subject reads clearly. Lifting a slightly underexposed portrait gives the face the attention it needs.
- Highlights: pulling these down recovers detail in bright skies, white dresses or window light that looked blown out.
- Shadows: lifting these opens up dark areas, revealing texture in clothing, hair or architecture without touching the rest of the image.
- White balance: corrects a cold or orange cast so whites look white, or deliberately warms the image to set a mood.
- Contrast: adds punch and separation between tones, or softens them for a gentler feel.
- Saturation and vibrance: push or restrain colour. Restraint often looks more professional than intensity.
- Clarity and texture: add local crispness to surfaces such as stone, fabric or skin pores, and can be reduced for a smoother look.
- Cropping and straightening: remove distractions, fix a tilted horizon and tighten the composition around the subject.
- Selective retouching: removes a stray bin, evens out a blemish or darkens a distracting background corner.
Each of these serves intent. You are guiding the eye to the subject, recovering detail the sensor captured but the default rendering hid, and setting a mood that matches the occasion.
A starter recipe you can try
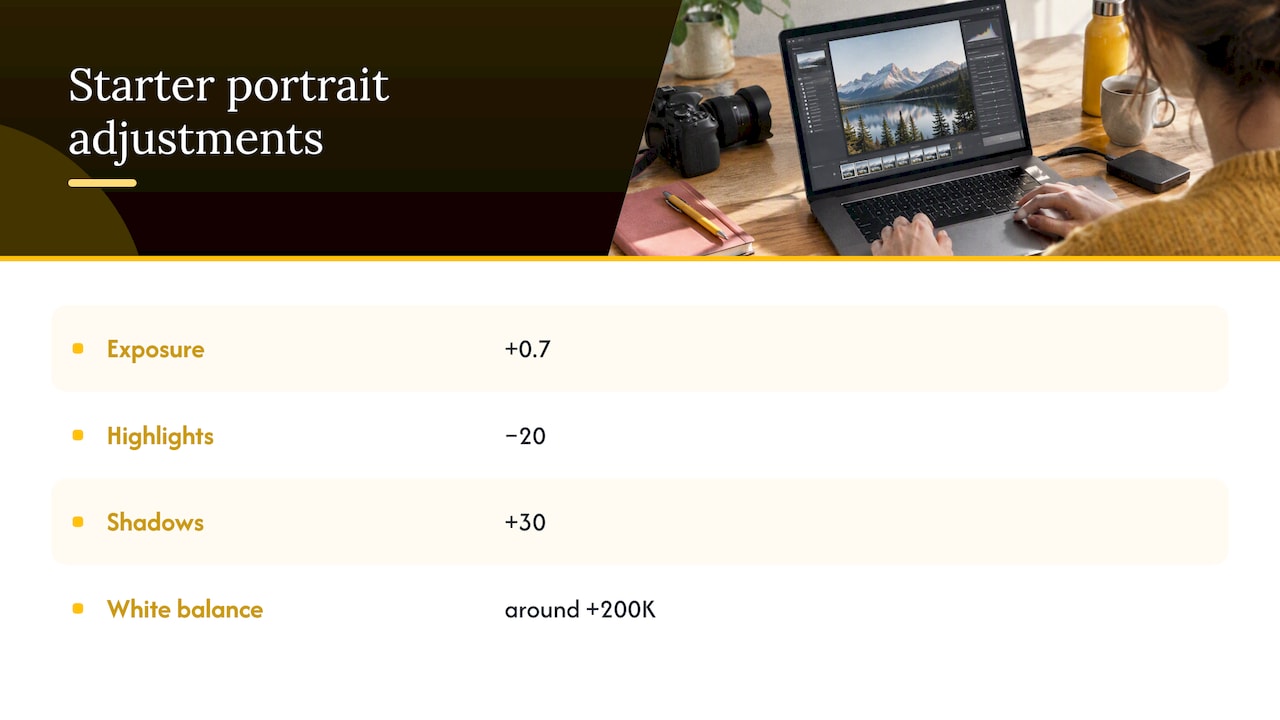
Say you have a slightly dark, cool-toned portrait taken in the shade. As a starting point, not a rule, you might try +0.7 exposure, −20 highlights, +30 shadows and a warmer white balance of around +200K. Then judge by eye. Every file reacts differently, so treat the numbers as a first move and adjust until skin tones look natural. The same recipe on a bright, warm beach photo would ruin it, which is exactly why presets are a starting point and not a finish line.
For a sense of how purpose shapes these choices on a real portrait session, our piece on headshot background colours shows how consistent output gets planned before the shutter is pressed.
How do you go from a RAW file to a finished photo?
A repeatable workflow saves more time than any single clever edit. A practical minimum, as Adobe describes it, is applying a camera profile, checking exposure and white balance, then exporting to JPEG or another delivery format. A fuller version looks like this:
- Import and back up. Copy files to at least two locations before you touch anything.
- Cull quickly. Flag the frames worth developing and reject obvious misses so you do not edit pictures you will never use.
- Choose a camera profile. Alternatively convert to DNG if that suits your archive. This sets the baseline rendering.
- Fix white balance and exposure first. Everything else builds on these two, so get them right before refining.
- Refine tone. Adjust highlights, shadows and the tone curve to shape contrast.
- Apply lens corrections and noise reduction. These clean up optical distortion and grain.
- Tune colour. Use the HSL controls to adjust individual hues, such as calming a too-green lawn.
- Crop and straighten. Compose the final frame.
- Retouch only as far as the brief needs. Stop when the image does its job.
- Save settings as presets and export. Use consistent export presets for JPEG or TIFF delivery.
The structure matches the typical sequence taught for Adobe Camera Raw, where settings are non-destructive and exports are copies, never overwrites of the original RAW.
Pro Tip: Edit one representative photo from a set until it looks right, copy those settings to the rest, then fine-tune each frame individually. Most of the work can be streamlined with copied settings, followed by individual fine-tuning.
What does shooting RAW give you technically, and what does it cost?
RAW is uncompressed camera-sensor data, while a JPEG is processed and compressed inside the camera. That difference explains almost everything else.
What you gain:
- More recoverable information. RAW files hold a wider dynamic range than JPEGs, so you can often recover detail in highlights and shadows, which Canon notes is especially useful for weddings and other moments you cannot repeat.
- Less artefacting when you push edits. A heavily lifted shadow in a RAW file tends to hold together better than the same lift on a compressed JPEG.
- Non-destructive editing. Camera Raw edits parameters instead of permanently rewriting pixels, so you can revisit the interpretation and export a new copy later. Exported JPEGs or TIFFs are separate files that leave the RAW data untouched.
- Multiple interpretations. The same capture can become a warm, soft version for one client and a crisp, high-contrast version for another.
What you pay:
- Bigger files. RAW takes more space on cards and drives, and takes longer to copy.
- A processing step. RAW files need conversion before normal sharing, so you will need to process and export them before posting.
- Software compatibility. Camera makers use proprietary formats, and support depends on your software being up to date.
Adobe states that most professional photographers shoot RAW because it preserves more sensor information and gives greater flexibility when correcting exposure and white balance. The price is larger files and a mandatory export step.
That statement is worth holding onto, because it answers the question many newcomers ask first: yes, working photographers generally accept the extra effort in return for the safety net.
Which software should you use, and what is DNG for?
You do not need every tool, just one that fits how you work. These are the mainstream choices:
- Adobe Camera Raw and Lightroom: integrated, non-destructive and well suited to batch work. Camera Raw and Lightroom share the same processing technology, with tone curve, HSL controls, lens corrections and presets.
- Capture One: valued for colour fidelity and tethered shooting. Some retouchers prepare RAW files in Capture One for exposure and white balance before moving to Photoshop for pixel-level work.
- Canon Digital Photo Professional: built around camera-specific processing, and Canon names it alongside Lightroom as a RAW-processing option.
Choosing between them is mostly about volume. For high-volume event work, presets and batch processing in Lightroom or Canon software keep turnaround quick. For a single hero image that needs careful retouching, a RAW processor followed by Photoshop can make sense.
Why DNG matters for the long term
RAW is not one universal file type. Adobe notes that support varies between programmes and recommends DNG as an open archival RAW format, with an Adobe DNG Converter that handles RAW files from more than 600 cameras. DNG retains the RAW information while reducing your dependence on any one camera maker’s format. The Adobe DNG Converter translates files from many cameras into DNG for future compatibility.
If you are starting out, pick one editor, learn it properly and keep your originals safe. Switching tools later is far easier when your archive is not tied to a single proprietary format.
How do you keep colours accurate from screen to print?
A photo that looks perfect on your monitor can print too dark or with the wrong cast if your workflow is not colour managed. The aim is simple: what you see is what you get, from edit to output.
- Calibrate your monitor. An uncalibrated screen misleads every decision you make. Colour-managed workflows depend on monitor calibration, sensible colour space choices, rendering intent and correct printer and paper profiles.
- Keep a consistent working colour space while editing, then choose the output colour space deliberately at export, depending on whether the image is for web or print.
- Use the right printer and paper profile. Different papers reproduce colour differently, and the profile tells the software how to compensate.
- Choose a rendering intent that suits the image, and proof prints from the same colour-managed workflow so you are comparing like with like.
- Use camera profiles and a neutral grey reference so skin and whites start from a trustworthy baseline, especially across a long event where light changes.
- Save presets for event shoots so every image shares one consistent look.
For web delivery, dimensions matter as much as colour. A practical guide to Instagram image sizes helps you export at the right dimensions for social platforms.
Pro Tip: Do your colour decisions on a calibrated screen in a room with steady, moderate lighting. Bright sunlight or a coloured wall can fool your eye into over-correcting.
What happens when different photographers edit the same RAW files?
The clearest proof that editing is interpretation comes from a simple experiment. In a Photography Life exercise, three photographers each edited the same RAW files and produced distinct final images. Same capture, different results, with differences in white balance, contrast, saturation and crops.
Canon frames this as interpretation rather than deception: RAW lets photographers produce multiple interpretations from one capture, and adjustments range from basic corrections to a distinctive visual style.
What the differences show, in practical terms:
- Warmer white balance tends to feel intimate and inviting, which suits weddings and lifestyle work.
- Higher contrast and clarity gives punch and drama, but can look harsh on skin.
- Muted saturation reads as calm and editorial, while boosted colour feels energetic and commercial.
- Different crops change what the picture is about, even when every pixel inside the frame is identical.
The useful takeaway is to treat your first edit as a draft. Try a different interpretation, save both as variants, and compare them after a break. This can help you learn more about your own taste than a tutorial can.
How does RAW or JPEG change your workflow and delivery times?
Shooting RAW adds a development step to every job, and that has a real effect on turnaround. A JPEG comes out of the camera ready to share, so a quick-turn job can be handed over almost immediately. RAW cannot skip conversion, so you need time to import, adjust and export before anything reaches a client.
The good news is that the cost is smaller than it sounds. Batch processing with presets and export recipes keeps a RAW workflow quick even on high-volume jobs, which addresses the common objection about time and storage. Many photographers also shoot RAW plus JPEG together, as the Ripon City Photographic Society notes, treating the JPEG as an immediate shareable copy and the RAW as a safety net for exposure and white balance recovery. Nikon’s advice agrees that RAW plus JPEG mode gives immediate files while keeping RAW for later editing.
For you as a client or a learner, the practical effect is predictability. RAW trades a little time for the ability to rescue a difficult frame, and a well-prepared preset library gets that time back.
Which format suits portraits, events, weddings and brand content?
The right format depends on how forgiving the situation is and how fast you need results.
- Portraits: RAW is the stronger choice. Skin tones respond to careful white balance and gentle retouching, and you can produce a warm or a clean look from one frame.
- Events: RAW still helps in mixed, changing light, but speed matters. Presets and batch export let you deliver quickly without giving up recovery latitude.
- Weddings: RAW is the safer option, because the moments cannot be repeated and the lighting swings from dim church interiors to bright outdoor sun. That wider dynamic range is exactly what gives you a chance of rescuing detail.
- Brand content: RAW lets you match colours to a brand palette and keep a consistent look across a whole campaign. Product shots in particular benefit from precise white balance.
A beginner who simply wants a good-looking file without editing can reasonably start with JPEG, since Nikon’s guidance is that the camera can develop a pleasing image automatically. RAW pays off when you want more control and are ready to learn the workflow.
Why we edit to the brief, not for its own sake
Editing is only worth doing when it serves the picture’s job. A wedding gallery, a founder headshot and a conference record each need something different, and the edit should make that purpose obvious, not show off what the software can do. At LemonLens we begin every booking by asking what the photos are for, and we edit to meet that brief and maximise its impact.
For events, we lean on consistent presets so a long evening carries one coherent look, and that is also what lets us deliver quickly. If you want to see how this plays out, our galleries show finished work from portraits to nightlife. Restraint is usually the better instinct: fix what is broken, protect what is working, and stop.
— Emmet
Need edited photos built around a clear brief?
If you would rather have finished images than learn the workflow yourself, we handle the whole process, from the first conversation about purpose to edited delivery. Portrait sessions start at £200 for The Solo, and our London event photography runs from £400 to £900, with rapid turnaround so images are ready while they are still relevant.
Pricing is transparent, the shoot is fully directed so you feel comfortable in front of the camera, and every frame is edited to serve your goal. Check availability or ask for a quote through our home page and tell us what the photos need to do.
FAQ
Do professional photographers use RAW or JPEG?
Most professionals shoot RAW, because it preserves more sensor information and gives greater flexibility when correcting exposure and white balance, according to Adobe. Many also shoot RAW plus JPEG so they have a quick shareable copy and a full-quality original.
Why don’t some photographers shoot RAW?
RAW files are larger and need processing before you can share them, which slows delivery. A photographer who needs instant results, or who does not want to edit, can reasonably choose JPEG and let the camera develop the image.
Is it better to edit RAW or JPEG?
RAW gives you more room to recover highlights, shadows and white balance without visible damage. A JPEG can still be adjusted, but it has already been processed and compressed, so heavy edits show their limits sooner.
Do all RAW photos need to be edited?
Every RAW file needs at least a conversion to a shareable format such as JPEG, and Adobe’s minimum workflow is a camera profile, a check of exposure and white balance, then export. Beyond that, how much you edit depends on the look you want.