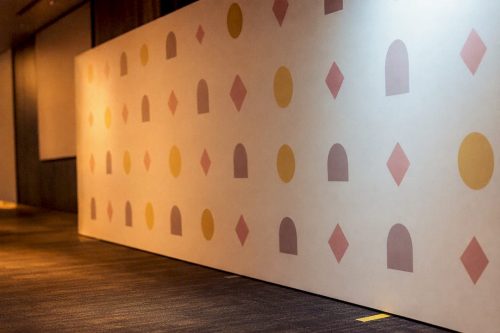
A step and repeat is a branded photo backdrop whose main job is to keep logos legible in every press or social image, so the priority is logo size, vector artwork and a signed-off proof before anything goes to print. Event planners, photographers and marketers all rely on the same backdrop for different reasons: planners need consistent brand exposure, photographers need a surface that behaves under flash, and marketers need images that hold up when cropped for social feeds.
TL;DR:
- Logos should be approximately 200 to 400 millimeters wide to ensure legibility from typical shooting distances and cropping needs.
- Use vector files with CMYK mode and a 3mm bleed, and obtain approval for proofed artwork at the actual shooting distance before going to print.
- Dye-sublimated fabric backdrops are preferred for flash-heavy photography due to their matte, seamless surface, while vinyl banners may cause hotspots under direct flash.
- Position lighting symmetrically at 45 degrees to evenly illuminate logos without glare, and maintain consistent color temperature across all lights to prevent color splits.
- For events with high press attendance, a step and repeat is cost-effective for repeated exposure, but it may be less suitable for small internal events or when crowd flow blocks the backdrop.
Table of Contents
- 1. What a step and repeat backdrop actually does
- 2. Design rules and the artwork brief to give suppliers
- 3. Materials, finishes and the sizes that actually work
- 4. Setting up and hanging the backdrop on the day
- 5. Camera and lighting settings for consistent results
- 6. A quick specs checklist for ordering and setup day
- 7. Field notes from LemonLens shoots
- 8. Lighting setups built specifically for repeat patterns
- 9. Common problems and how to fix them on the spot
- 10. Beyond the logo grid: creative backdrop variations
- 11. Choosing materials with sustainability in mind
- 12. When a step and repeat earns its place, and when it does not
- 13. How LemonLens covers step and repeat events
- 14. Where to go for templates, materials and technique
- Sources
- FAQ
1. What a step and repeat backdrop actually does
The name describes the pattern rather than the object: a logo or design repeats across the panel so that wherever a subject steps and stops, at least one full logo sits clean in the frame. The format grew out of red-carpet press photography, where dozens of photographers shoot from slightly different angles and need a backdrop that reads correctly from most of them.
Typical uses include:
- Red carpets and press walls at premieres, launches and award events.
- Trade show booths where repeated branding needs to survive hundreds of casual phone photos.
- Product launches and press days where sponsor logos must appear alongside the host brand.
- Photo booths at corporate parties and weddings, often with a lighter, more decorative repeat.
The appeal for brands is straightforward: every photo taken in front of the wall becomes free, repeated exposure, provided the logos are actually legible once the image is resized for a feed or a print page.
2. Design rules and the artwork brief to give suppliers
Get the brief right before anyone touches a printer, because a backdrop that looks fine on screen can still fail on camera if the logos are too small or too tightly packed.
- Set logo width to roughly 200 to 400 millimetres, the range most UK suppliers recommend for step and repeat banners, and size up if photographers will be shooting from further back or cropping tighter on faces.
- Space logos so at least one full repeat sits behind head height at typical standing positions, since camera crop, not just backdrop size, determines what actually reads in the final image.
- Alternate a primary logo with sponsor marks in a clear grid rather than scattering sizes and styles, which keeps the pattern calm and avoids one brand dominating by accident.
- Ask for vector files (PDF, AI or EPS) rather than JPEGs or screenshots, confirm CMYK colour mode, and request a 3mm bleed so nothing gets clipped at the trim edge, following the artwork checklist suppliers set out for step and repeat production.
- Insist on a digital proof before the job goes to print, and view it at roughly the distance a photographer will actually shoot from, not zoomed in on a laptop.
- Get written permission from every sponsor before their logo appears, since a backdrop is effectively a publication the moment it is photographed.
Pro Tip: Print a same-day A3 test panel of just the logo grid before committing to the full backdrop run: it is the cheapest way to catch a size or spacing mistake.
3. Materials, finishes and the sizes that actually work
Two materials dominate the market, and the choice affects how the backdrop behaves under flash as much as how it looks in storage.
- Dye-sublimated fabric produces a matte, seamless surface with no shine, which is why suppliers position tension fabric walls as the preferred option for flash-heavy press photography; panels are commonly available from 1m to 6m wide and the fabric is machine washable, so damaged sections can be cleaned rather than replaced.
- PVC vinyl banners cost less and print quickly, but the surface has more shine, which shows up as hotspots in direct flash photos unless lighting is angled carefully.
- Widths around 3 m and 4 m commonly cover standard press formats: about 3 m suits a single-row line-up of talent, while about 4 m gives room for group shots without anyone standing off the pattern.
- Finish options include pole pockets and eyelets for frame mounting, silicone edge strips for tension fabric systems, and hemmed edges for simple vinyl drops.
Turnaround varies by supplier and finish, so build in time for prepress checks and a proof round rather than ordering against a tight deadline; supplier guides describe this checking and proofing workflow as standard practice before any large-format job goes to print.
4. Setting up and hanging the backdrop on the day
Getting the physical install right matters as much as the artwork, since a sagging or glaring backdrop undoes good design.
- Choose a stand or frame rated for the venue: a lightweight pop-up frame suits a small press day, while a heavier telescopic or truss frame copes better with a busy red carpet and repeated adjustment.
- Tension fabric panels fully before guests arrive; a loose fabric wall ripples under flash and creates uneven shadows across logos.
- Position the backdrop so photographers have roughly 3 to 4 metres of shooting distance, with a marked stepping point on the floor so talent knows exactly where to stand.
- Check sightlines from the photographers’ side, not just from where guests will walk, and keep cables, stands and sandbags taped down to remove trip hazards along the approach line.
5. Camera and lighting settings for consistent results
Shoot a test frame the moment the backdrop goes up and lock white balance from it rather than leaving the camera on auto, since mixed venue lighting and LED signage will otherwise shift colour from one guest to the next. Photography communities that cover mixed flash and ambient light generally agree that consistency matters more than raw brightness once the light is locked in.
- Use fill flash or a portable strobe bounced or diffused rather than fired straight on, since direct flash on a glossy vinyl panel throws back a hotspot that ruins the background.
- Angle the flash slightly off-axis, or move the stand a few degrees from square, if the backdrop material has any shine at all.
- A 70 to 200mm f/4 zoom or a fast 135mm prime shot close to wide open separates the subject from the repeating pattern without losing logo legibility, a kit combination red-carpet photographers commonly favour alongside a standard 24 to 70mm for wider group shots.
- Set an anti-flicker or electronic first curtain option where the camera supports it, since LED backdrop lighting and venue signage can otherwise band across frames shot at high shutter speeds.
Tethering to a laptop, or at minimum shooting to a fast card with instant preview, speeds up the selection process once the event is moving quickly. Pre-built caption templates carrying event name, date and sponsor credits, a habit documented in professional red-carpet workflows, cut minutes off delivery when a PR team needs images out within the hour. Similar principles apply when balancing lighting on location shoots, where preserving atmosphere while controlling exposure is the same core skill.
Pro Tip: Shoot one clean frame of the empty backdrop before guests arrive: it gives you a lighting reference and a usable sponsor-only image for reporting.
6. A quick specs checklist for ordering and setup day
Keep this list to hand when briefing a supplier or setting up backstage.
- Artwork supplied as vector PDF, AI or EPS, in CMYK, with 3mm bleed.
- Written permission on file for every sponsor logo before print.
- Logo width confirmed in the 200 to 400 millimetre range and proof approved at real shooting distance.
- Material and frame dimensions confirmed against the venue’s available space.
- On-the-day kit packed: gaffer tape, a floor marker for the stepping point, a lint roller for fabric panels, and a spare frame arm or clamp.
7. Field notes from LemonLens shoots
The wall only works if the photographer can see it clearly through the crowd. Everything else, lighting, lens choice, timing, follows from that.
Shooting recurring rave and DJ series has reinforced how much crowd flow around a step and repeat determines the images: a badly placed wall gets blocked within minutes, while one set slightly off the main traffic line stays clean all night. Quick edit and caption templates, carried over from press-wall work, keep turnaround fast when a promoter needs images live before the next set starts. That same discipline runs through recurring event coverage and through artist promo shoots, where performers need usable press images within a similarly tight window.
— Emmet
8. Lighting setups built specifically for repeat patterns
A step and repeat behaves differently under light than a plain backdrop, because the eye reads the pattern first and the subject second if the lighting is uneven. The safest baseline is two lights positioned symmetrically either side of the stepping point, angled in at roughly 45 degrees, which lights the logos evenly without throwing a harsh shadow behind the subject.
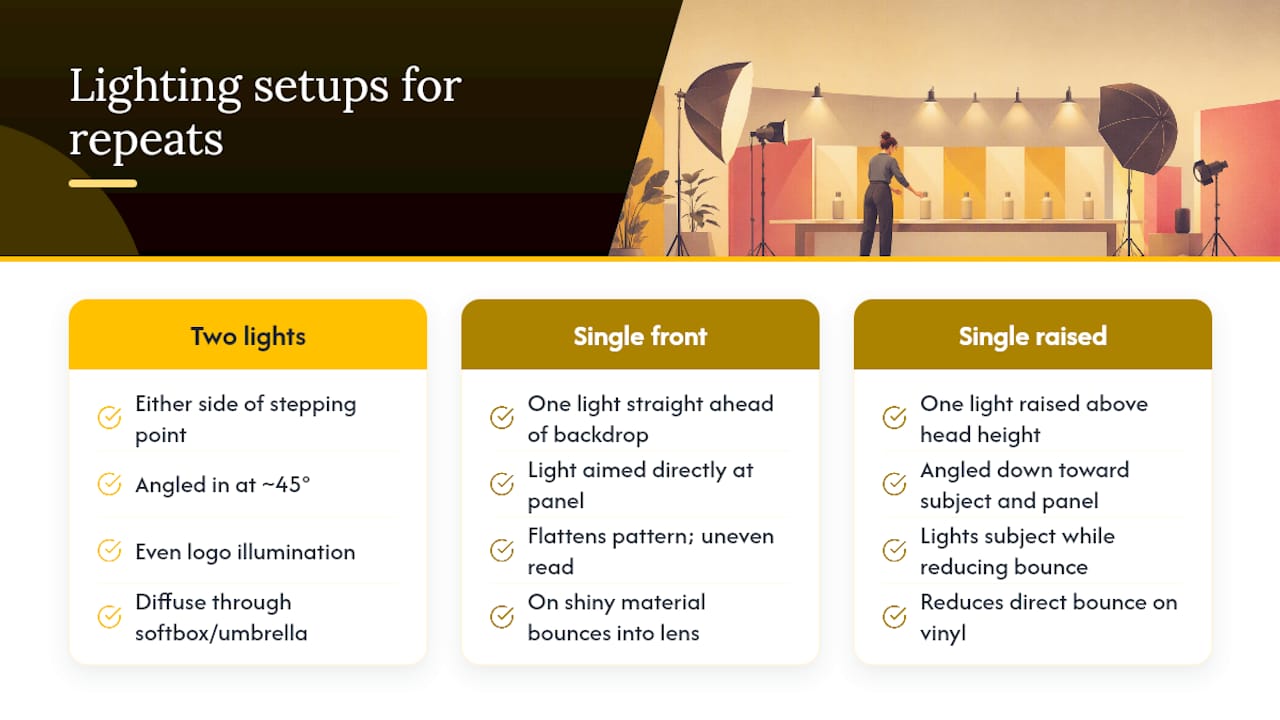
Avoid a single light straight ahead of the backdrop: it flattens the pattern and, on any shiny material, bounces straight back into the lens. Diffusing each light through a softbox or shoot-through umbrella softens that reflection and keeps logo edges sharp rather than blown out.
Where a venue only allows one light, raise it slightly above head height and angle it down, which reduces the direct bounce off a vinyl surface while still lighting the subject’s face properly. Fabric panels are more forgiving here since the matte finish scatters light rather than reflecting it directly back.
Keep a consistent colour temperature across every light on the backdrop, including any ambient venue lighting that spills onto the panel. A backdrop lit half by warm tungsten and half by cooler LED signage will show a visible colour split down the middle of every photo, which is far harder to fix afterwards than to prevent on the night.
9. Common problems and how to fix them on the spot
Glare is the most frequent complaint on vinyl backdrops, and the fix is almost always angle rather than power: move the flash off-axis a few degrees before turning it down. Wrinkles on fabric panels usually mean the tension straps were not pulled fully before the doors opened, so a mid-event retension, done quickly between guest arrivals, solves it faster than trying to edit them out later.
Queues building in front of the wall slow everything down, particularly when a PR team wants specific pairings photographed together. Assigning one person to call names and manage order, separate from the photographer, keeps the line moving and stops awkward waiting in shot.
Uneven crowds around the stepping point, especially at busy launches, mean some guests end up half off the pattern. A taped floor marker fixes most of this, but a second small mark a step back gives a fallback position when the first spot is blocked by another photographer or a sponsor rep.
Finally, watch for logos disappearing behind tall guests or oversized outfits. There is little to be done mid-shoot beyond repositioning the stepping point slightly, but noting it during setup, by walking the space at the actual height of an average guest, catches most of the problem before doors open.
10. Beyond the logo grid: creative backdrop variations
Standard step and repeats work because the pattern is predictable, but plenty of events use variations that still function under a camera. Illustrated or thematic backgrounds, built around an event’s visual identity rather than a repeating logo grid, suit product launches and brand parties where the goal is mood as much as sponsor visibility.
Mixed-scale layouts, where a large hero logo anchors the centre and smaller sponsor marks repeat around it, work well when one brand is clearly the host and others are supporting. Seasonal or themed reskins of the same frame, swapping the fabric panel for a different design between events, let venues and recurring event series keep one physical stand while refreshing the look each time.
Whatever the variation, the same photography rules apply: logos still need to sit at a legible size for the expected shooting distance, and any illustrated elements should avoid the same glossy finishes that cause flash glare on standard vinyl.
11. Choosing materials with sustainability in mind
Material choice affects more than photo quality. Dye-sublimated fabric panels are machine washable, which means a single backdrop can be reused across many events rather than replaced, cutting down on repeat print runs for recurring series or long-running sponsorships. PVC vinyl, by contrast, is typically treated as a single-use or short-run product, printed for one event and often disposed of afterwards.
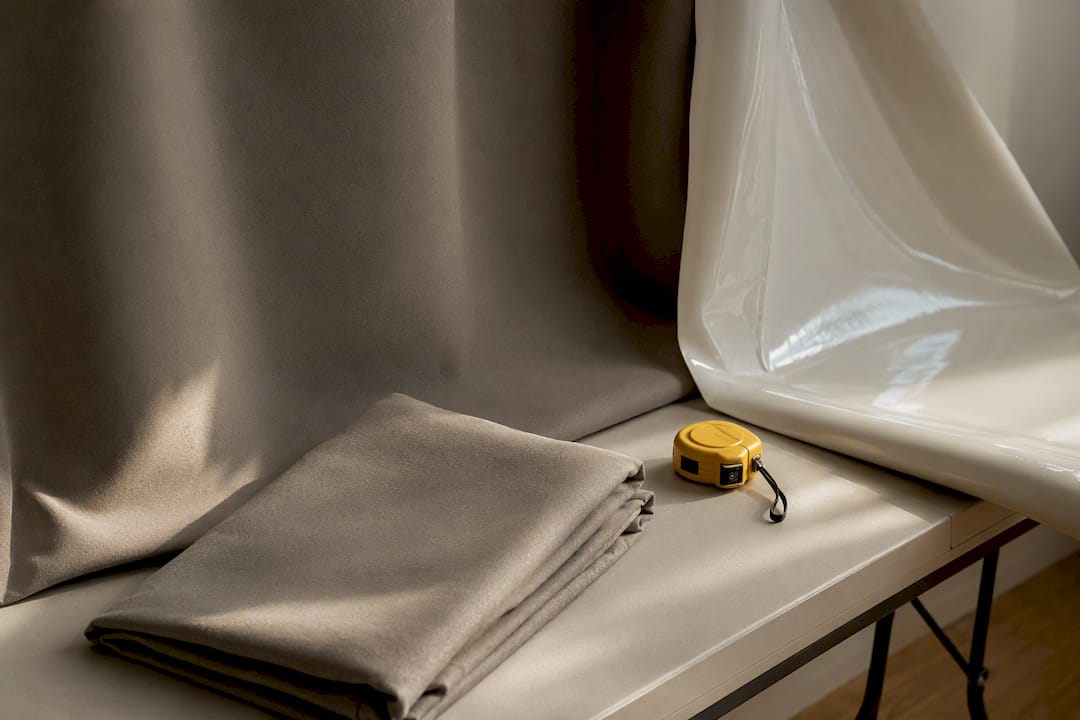
For organisers running the same branding across multiple dates, a reusable fabric wall reduces both cost and waste over time compared with reordering vinyl for every date. Where a one-off event genuinely needs a single print, choosing a supplier that offers recycling or take-back schemes for vinyl banners is worth asking about directly, since practices vary by printer.
12. When a step and repeat earns its place, and when it does not
A step and repeat pays off when press attendance is genuinely high and the brand needs consistent, repeatable exposure across many separate photos, such as a red carpet or a multi-sponsor launch. It earns its keep less clearly at small internal events, where an experiential installation or on-stage branding often photographs better and leaves a stronger impression than a static wall few guests actually stop at.
Pro Tip: If foot traffic past the wall looks thin, move the photographer to it rather than waiting for guests to find it.
— Emmet
13. How LemonLens covers step and repeat events
LemonLens briefs every shoot around what the images need to achieve, whether that is sponsor visibility, press pickup or social content, then prelights the backdrop before doors open so nothing is guessed on the night. Coverage typically sits within London event photography, priced between £400 and £900 depending on scope, or under the Corporate Event Day Rate from £650 per day for launches and conferences that need a photographer on site throughout. Images are delivered within 48 hours, so press and sponsor teams have usable photos while the event is still current. Get in touch through London event photography to check availability for your date.
14. Where to go for templates, materials and technique
For artwork templates and logo sizing guidance, BetterPrinting’s step and repeat guide and Banner World’s how-to both cover artwork requirements and proofing in detail. For material and finish choices, Displaysense’s backdrop range sets out tension fabric options and sizing. For camera settings and red-carpet workflow, PoGeo’s 2025 breakdown covers kit, lighting and delivery speed. Photographers looking to be found for this kind of work may also find SEO guidance for photographers useful.
Sources
- Step and repeat banners | BetterPrinting
- How to create a step and repeat banner | Banner World
- Custom event backdrops | Displaysense
- Red carpet photography in 2025 — cameras, lights and workflows | PoGeo
FAQ
What is a step and repeat photo?
A step and repeat photo is an image taken in front of a backdrop printed with a logo or design repeated in a grid, most commonly used on red carpets and at press events. The repeating pattern means at least one clean logo appears behind the subject regardless of exactly where they stand.
How many logos should go on a step and repeat?
There is no fixed count: the right number depends on backdrop size and how far back the camera will be shooting, which is why suppliers focus on logo width rather than a set number. A single dominant logo repeated evenly, or a mix of host and sponsor marks in a clear grid, both work provided each logo stays legible in the frame.
What does a step and repeat backdrop look like?
It is a printed fabric or vinyl panel showing one or more logos repeated in a regular pattern across the full width, usually hung flat on a frame or tension stand behind a marked stepping point. Materials range from matte dye-sublimated fabric to glossier PVC vinyl, which affects how the panel photographs under flash.
Why is it called a step and repeat banner?
The name comes from how it is used: a subject steps into position in front of the repeating pattern, a photo is taken, and the next subject steps in to repeat the process. Wikipedia’s summary of the format ties the name directly to this stepping and repeating action at press events and red carpets.