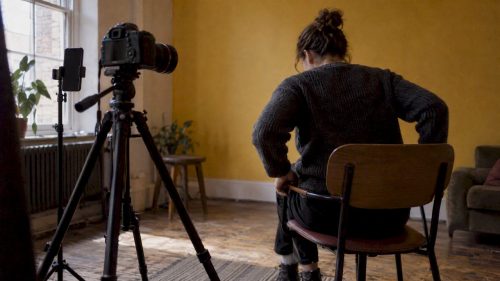
The minimal working interview setup is a camera at eye level, a single soft key light or angled window, a lavalier or shotgun mic with headphone monitoring, a tripod, a quiet room, and 20 to 30 seconds of wild track recorded at the end. This holds whether you are shooting on a phone, a mirrorless camera, or running two cameras for angle variety: the gear scales up, but the fundamentals stay identical.
TL;DR:
- Use a stable camera at eye level with consistent framing according to the rule of thirds, and slightly vary angles if using a single camera for better edit points.
- Prioritize audio quality with a lavalier or shotgun mic, set levels correctly, and record room tone for 20 to 30 seconds to smooth audio cuts.
- Keep lighting simple with natural or basic three-point setups, avoiding harsh shadows and color mismatches, especially in mixed daylight and artificial conditions.
- Prepare thoroughly by checking batteries, format media, and conducting sound and scene checks to address issues early and ensure smooth recording.
- When in doubt, focus on good audio and comfort for the interviewee; spend your budget on a quality mic and a sturdy tripod before investing in high-end lighting.
Table of Contents
- Gear at a glance and the setup checklist
- Camera and framing: placement, settings and single vs multi‑cam
- Lighting: three‑point basics, window setups and simple modifiers
- Audio: mic choices, placement, sound checks and wild track
- Pre‑shoot prep and interview technique
- B‑roll and coverage strategy
- Quick checklist and troubleshooting on the day
- Practical habits that keep interview shoots moving
- What to prioritise when time or kit is limited
- How we can help if you’d rather hire a videographer
- FAQ
- Sources
Gear at a glance and the setup checklist
Interview footage lives or dies on audio and stability, not lens glass. A £50 lavalier mic and a sturdy tripod will save a shoot that an expensive camera body cannot rescue if the sound is unusable or the frame is shaky.
- Budget kit: smartphone with a tripod mount, clip‑on lavalier mic, a window for light, a basic phone tripod.
- Mid‑tier kit: mirrorless camera, shotgun mic on a boom or stand, one LED panel plus a reflector, a fluid‑head tripod.
- Professional kit: two camera bodies, wireless lavalier with a backup recorder, three‑point lighting, a dedicated audio mixer.
Before anything powers on, run through a short checklist: charge batteries and bring a spare, format memory cards and confirm free space, agree on a file naming convention so clips are easy to find later, and do a headphone check to confirm the mic is actually recording. A simple clap or slate at the start of each take makes syncing audio and video painless in the edit. Keep a basic shot list on paper or your phone, and get verbal or written consent from your interviewee before you start rolling, this matters as much as any piece of kit.
Camera and framing: placement, settings and single vs multi‑cam
Position the camera at the interviewee’s eye level and lock it to a tripod. This single habit does more for perceived professionalism than any lens upgrade. Frame using the rule of thirds, with the subject’s eyes roughly a third of the way down from the top of the frame, and leave looking room in the direction they’re facing rather than centring them dead in the middle. The Local Trust guide to filming vox pops recommends exactly this head‑and‑shoulders framing with the eye line about a third from the top, and a quiet location to avoid unusable audio.
Settings depend on your output frame rate. Match your shutter speed to roughly double your frame rate: around 1/50 at 24fps, 1/60 at 30fps. This keeps motion looking natural rather than stuttery or overly smooth. For subject separation from the background, a wider aperture (f/2.8 to f/4) gives a soft, blurred backdrop, though it demands more precise focus. Keep ISO as low as the room allows: noise creeps in fast once you push past 1600 on most consumer cameras. Focus on the interviewee’s nearest eye and lock it there rather than relying on continuous autofocus, which can hunt during a long answer.
- Single camera: shoot the full interview on one angle, then plan cutaways and reaction shots separately to vary the edit.
- Two camera: add a second body on a wider or tighter angle for instant cutting options without needing extra b‑roll.
Pro Tip: If you’re running one camera, slightly reframe every few questions, a small push‑in or angle shift gives editors a natural cut point without needing a second body.
Lighting: three‑point basics, window setups and simple modifiers
Three‑point lighting remains the reliable default: a key light angled 30 to 45 degrees from the subject’s face, a softer fill on the opposite side to lift shadows, and a backlight or practical lamp behind them to separate subject from background. You don’t need three professional fixtures to get there. A single LED panel as your key, a white foam board or reflector as fill, and a cheap lamp or window glow in the background will do the job in most small rooms.
Natural light works just as well as a built fixture. The University of Oxford’s guide to shooting movies on mobile recommends positioning your subject so window light hits them at an angle rather than head on, with a reflector or lamp as fill to stop harsh shadows forming on one side of the face. Avoid placing a window directly behind your interviewee: you’ll end up silhouetting them against the brightest part of the frame. The University of Hull’s production guide makes a similar point about overhead lighting, which tends to cast unflattering shadows under the eyes and nose; angled light with a fill is consistently more flattering.
- Overcast day: window light is soft and even, ideal as a key with minimal fill needed.
- Direct sun through a window: diffuse it with a net curtain or diffusion fabric to avoid harsh, blown‑out highlights.
- Mixed light sources: match colour temperature where possible, or correct in post, since daylight and tungsten mixed in one frame reads as an odd colour cast on skin.
Pro Tip: Keep your key light on a dimmer or adjust distance rather than swapping bulbs mid‑interview, consistent exposure across a long conversation matters more than perfect brightness.
Audio: mic choices, placement, sound checks and wild track
Audio quality matters more than video quality in an interview. Viewers forgive a slightly soft frame; they do not forgive muffled or distorted speech.
A lavalier mic clipped to clothing gives consistent, hands‑free audio and is forgiving of small head movements, but it can pick up fabric rustle if clipped against loose clothing or jewellery. A shotgun mic on a boom or stand gives richer, more natural tone and keeps the frame clean of visible hardware, though it needs careful aiming and a quieter room to avoid picking up ambient noise. A handheld mic works for quick vox‑pop style interviews but looks less polished for a seated, longer conversation.
- Lavalier placement: clip roughly a hand’s width below the chin, angled slightly upward, and tuck excess cable to avoid handling noise.
- Shotgun placement: aim just above the frame line, close enough to capture clear speech without dipping into shot.
- Gain staging: set levels so peaks sit around minus 12 to minus 6 decibels, leaving headroom for louder moments.
Monitor through headphones throughout, not just at the start, since a cable can loosen or a mic can shift partway through a long answer. The Conference Mic System guide from FireflyAV is a useful reference if you’re comparing lavalier and shotgun systems for a more formal setup.
Statistic callout: record 20 to 30 seconds of ‘wild track’, silent room tone captured right after the interview ends, according to the IPS encyclopedia entry on wild track. Editors use this clean room ambience to smooth over audio cuts and fill gaps, so skipping it can leave obvious jumps in the final edit.
Pre‑shoot prep and interview technique
Technical setup only pays off if the interviewee is comfortable and the conversation flows. A few minutes of preparation before you hit record makes a measurable difference to how natural the footage looks.
- Confirm consent and spell out names on camera or on a notepad, so you have accurate credits and metadata later.
- Spend a few minutes on warm‑up chat unrelated to the shoot, this relaxes most subjects more than any technical adjustment.
- If someone is visibly nervous, try reversing roles briefly and let them interview you first, this often loosens up their next answer.
- Start with an easy, low‑stakes question rather than your most important one, saving the strongest material for once they’re settled.
- Ask the interviewee to leave a short beat of silence before and after each answer, which gives you clean edit points later.
- Have your shot list and rough b‑roll plan ready before you begin, so you’re not scrambling to remember coverage once the interview starts.
The BBC Academy’s tips for interviewing back this up directly: building rapport through brief warm‑up conversation and keeping questions concise consistently produces clearer, more natural answers.
B‑roll and coverage strategy
Plan b‑roll before the interview, not after. A mix of wide, medium, and close‑up shots gives an editor the flexibility to cut around pauses, repeated words, or awkward phrasing without the footage feeling static.
- Wide shots: establish the location and context, used sparingly at the start or during transitions.
- Medium shots: your main interview coverage, where most of the dialogue will sit.
- Close‑ups: hands, objects, or details relevant to what’s being discussed, useful for cutaways.
- Contextual cutaways: the environment, tools, or people the interviewee references, shot separately before or after.
As a rough rule of thumb, the Shelter self‑shooting guide suggests capturing around four times the footage you expect to use in the final edit, since b‑roll gaps are far harder to fix after the shoot than during it. Hold each shot for 5 to 10 seconds minimum, vary your angles and focal lengths so clips don’t look repetitive when cut together, and avoid excessive camera movement or dim corners that will stand out against your main interview lighting. Jot a one‑line note after each shot, what it shows and where, so you’re not scrubbing through hours of footage later trying to remember what you filmed.
Quick checklist and troubleshooting on the day
Things go wrong on set regularly. Most problems are fixable in under a minute if you catch them early.
- Run a sound check before the first real question: speak at normal volume and confirm levels on your headphones or recorder display.
- Record a slate or clap at the start of each take to make syncing multiple cameras or audio sources straightforward later.
- If you hear an echo, hang a blanket or soft furnishing nearby, hard walls and bare rooms are the usual culprit.
- Swap a buzzing or flickering lamp immediately rather than hoping it won’t show in the final cut.
- Move your subject away from reflective walls or glass if you’re getting unwanted glare or colour bounce.
- If grain is visible, lower your ISO and compensate with a wider aperture or added light rather than pushing sensitivity further.
- Record a backup copy to a second card or drive before you leave the location, and label files clearly as you go.
Pro Tip: Keep a spare set of batteries and a backup recorder running even on a simple one‑camera shoot, a dead battery mid‑answer is far more disruptive than a slightly imperfect frame.
Practical habits that keep interview shoots moving
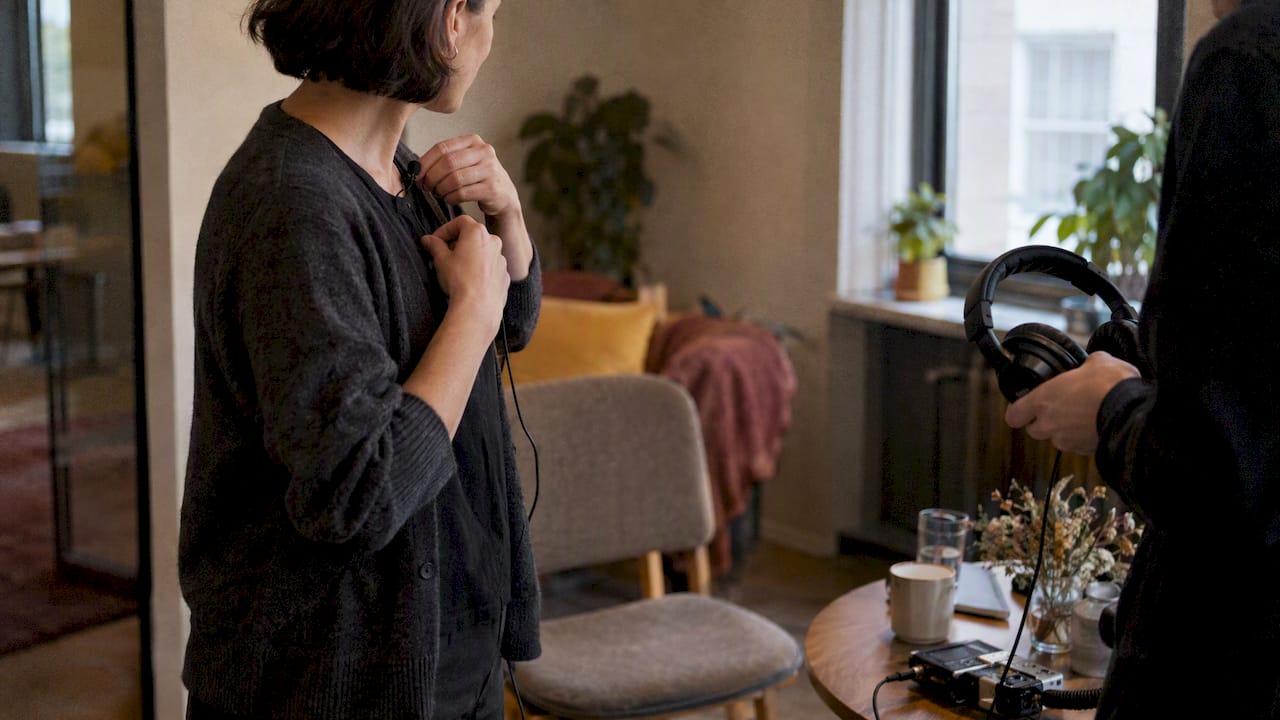
On our own shoots, we lean on a short warm‑up chat before recording starts, a quick lav check through headphones, and small light tweaks rather than full relights between questions. Keeping modifiers simple, one key, one fill, one practical, means we can reset fast between setups and keep a contributor talking naturally rather than waiting on gear. A testimonial video shoot for a hospitality client follows exactly this rhythm: quick setup, direct guidance, minimal downtime.
What to prioritise when time or kit is limited
When you’re short on time or equipment, audio and comfort beat lighting polish every time. A viewer will forgive a flat background far sooner than muffled speech or a visibly stiff interviewee. If you’re spending your first pound on gear, put it towards a decent lavalier mic, then a stable tripod, and only then a light. Test your setup on yourself before the real shoot, a five‑minute run‑through catches most problems before they cost you a take.
— Emmet
How we can help if you’d rather hire a videographer
If reading all this makes you want to hand the technical side to someone else, that’s exactly the gap our videography service fills: we handle camera placement, lighting, and sound so you can focus on the conversation itself. Every booking starts by clarifying what the footage needs to achieve, whether that’s a testimonial, a brand piece, or event videography coverage, and we direct the shoot to get natural, usable answers rather than stiff, over‑rehearsed ones.
- DIY suits you if: you have time to test your setup beforehand and a reasonably quiet space to shoot in.
- Hiring suits you if: you need a polished result quickly, have multiple contributors, or want multicam coverage without juggling two bodies yourself.
Contact us to inquire about availability and receive a quote for your interview or testimonial shoot.
FAQ
How should I set up for a video interview?
Place your camera at eye level on a tripod, light your subject with a single soft key at an angle (or a window used as key light), and fit a lavalier or shotgun mic with headphone monitoring. Record a quiet room, do a sound check first, and capture 20 to 30 seconds of wild track at the end for editing.
What is the 30-60-90 rule in an interview?
This isn’t a standard video production term, and definitions of it vary depending on context, so there’s no single agreed rule to point to here. For camera framing, the more widely used guidance is the rule of thirds: position the subject’s eyes roughly a third down from the top of frame, as recommended in the Local Trust vox pop guide.
What is the best camera setup for interviews?
A single camera at eye level on a stable tripod, framed with the rule of thirds and a shutter speed roughly double your frame rate, covers most interview needs. Adding a second camera on a different angle, as in multicam live shoot workflows, gives extra cutting options without needing more b‑roll.
What are the 5 C’s of interviewing?
This phrase isn’t a recognised standard across video production or journalism guides, so there’s no fixed definition to confirm. The practical fundamentals that production guides consistently emphasise instead are consent, comfort, clarity of audio, consistent framing, and coverage through sufficient b‑roll.
Why do I need to record room tone after an interview?
Room tone, or wild track, is silent ambient sound from the same space, recorded for 20 to 30 seconds once the interview ends. Editors use it to smooth gaps between audio cuts, according to the IPS encyclopedia entry on wild track, so skipping it can leave noticeable jumps in the final sound.
Sources
- IPS: Wild track guidance
- DG047 shooting movies on mobile (University of Oxford coursebook)
- Video self-shooting: a practical guide (Shelter)
- BBC Academy: top tips for interviewing
- How to film a short interview or ‘vox pop’ (Local Trust)